I recently had the inclination and the opportunity to work with a Raspberry Pi 5, and I needed to document the work I was doing.
Some of this work required grabbing screenshots, but the usual screenshot tools did not work cleanly, for whatever reason. I suspect that the base reason is likely a PEBKAC, but I will console myself with the misplaced hope that it has to do with the switch from X11 to Wayland in the Raspberry Pi OS.
Some research suggests that other people had a similar issue (and I would like to officiually order a Pox on the Houses ™ of all the “tech blogs” out there that updated their old posts regarding screenshot tools without testing them).
I was working with a fresh install of the 64 bit Raspberry Pi OS from 23 December 2023 on a Pi 5. Flameshot, Gnome Screenshot, Kazam, etc all failed to work in different ways. My specific use cases are:
- take a screenshot of a specific section of the screen; and
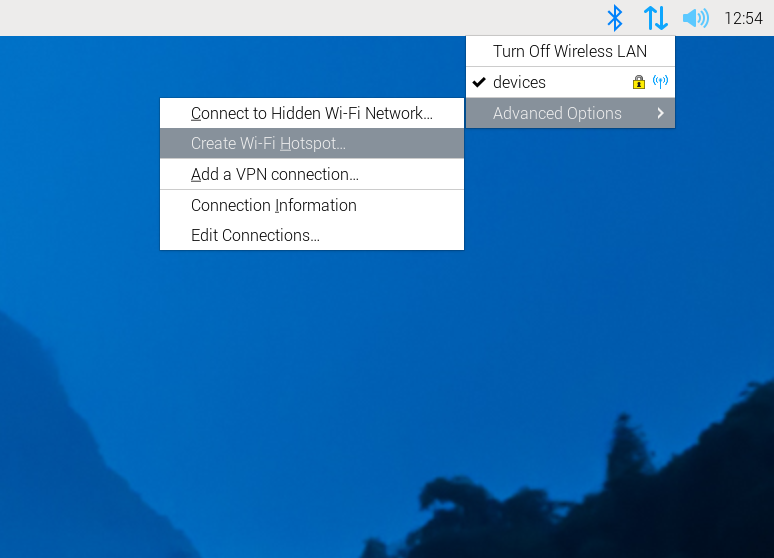
- take a screenshot of an expanded menu to highlight options within the menu.
The way I was able to get this done involved two command line tools: grim and slurp.
To take a screenshot of a specific section, use:
grim -g "$(slurp)"
Once you enter this in the terminal, you can select the area you want to capture using your mouse, and once the area has been selected, the screengrab occurs
To get a menu as well, use:
grim -g "$(slurp; sleep 10)"
The addition of “sleep” creates a pause measured in seconds (“sleep 10” creates a 10 second pause). To grab a menu (or any other time-based visual that needs to be set into motion) enter the command, select the area where the menu will open, and then get the menu in place within the pause.
I’m leaving this here as a note for myself, because this is the type of thing I’ll use once a week, or once a fortnight — so it’s the perfect thing for me to forget, and need to look up fresh each time.